

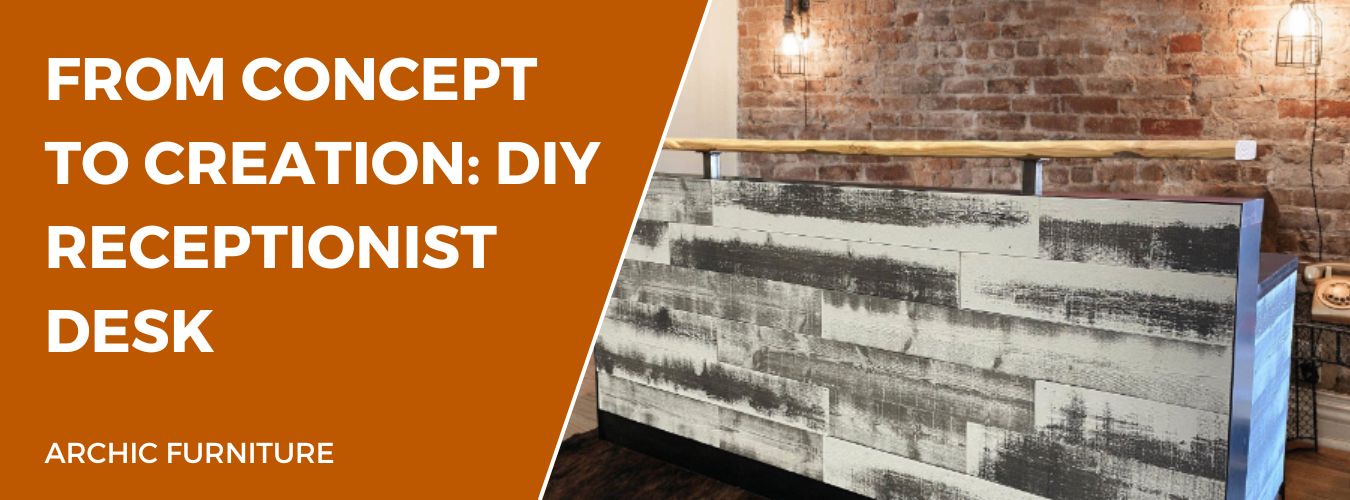
Making a DIY receptionist desk can help a lot. It can be functional and stylish. It can improve customers' first impression.
It will happen when they enter your business. A good reception desk helps organize.
It also manages customer interactions. It also sets a welcoming tone for your workspace.
Building your reception desk can be rewarding. It saves money and allows for customization.
With the right tools and materials, you can build a practical and good-looking desk. It will leave a lasting impression on all who visit your space.
A good receptionist desk is well-planned. It mixes function, budgeting, and design. We focus on assessing the space. Setting a budget. Selecting an appropriate style.
Are you ready to take your office space to the next level? It's time to get inspired and start planning your DIY receptionist desk!
With a little creativity and some elbow grease, you can build a stunning DIY reception desk that will impress all of your clients and visitors. Start by researching how to build a receptionist desk and gather all of the necessary materials.
Look for reception desk plans online to get some ideas and guidance on the construction process. Once you're ready, roll up your sleeves and get to work - it's time to build a reception desk that will make a statement in your office.
Don't be afraid to think outside the box and explore different reception desk ideas DIY to make your desk truly unique and personalized to your style.
Get ready to impress everyone who walks through your door!
First, measure the area where the desk will go.
Consider the workflow. Ensure there’s enough room for your receptionist to move.
Identify key features like storage needs. A crowded area can impact efficiency.
Think about outlets for computers, phones, and other devices. They are for electricity.
Plan for enough desk space to handle anticipated tasks.
Choose a location that makes the desk accessible for both staff and visitors.
Setting a cost limit early. It can prevent overspending.
List required materials like wood, nails, screws, and finishes.
Accounting for materials. Think about whether you need any special tools.
Determine if you will buy or rent these tools.
Divide some funds for unexpected expenses.
When choosing a style, consider the aesthetic of the area. The desk should match or complement existing décor.
For a modern look, use clean lines and sleek finishes. Traditional styles might have ornate details. They might also have rich wood finishes.
Think about practicality and the daily usage of the desk.
Make sure the chosen design looks good. Also, make sure it works well.
Use quality materials. Ensure durability and ease of maintenance.

To build a DIY reception desk, having the right tools, materials, and safety equipment is crucial. Good preparation ensures the project is done well. It keeps it efficient and safe.
Constructing a reception desk requires a variety of tools. Some basic tools include:
Measuring Tape: Accurate measurements are vital. They ensure all parts fit.
Handsaw or Circular Saw: These are used to cut wood to the required sizes.
Drill and Drill Bits: Holes will be needed for screws and other attachments.
A screwdriver can be manual or electric. Both types can be helpful.
Sanding Block or Electric Sander: Smoothens the surfaces of the wooden pieces.
Clamps: Essential for holding pieces together while the glue dries.
Paint Brushes and Rollers: These are required for the finishing touches. If you plan on painting or staining the wood.
Using these tools will make construction easier. It will also make it more professional.
The materials you choose for your desk will affect its durability and appearance. Some key materials include:
Plywood or MDF Boards: These form the main structure of the desk.
You need wood glue. It secures pieces before you screw or nail them.
Screws and Nails: Opt for different sizes for various parts of the desk.
Laminate or Veneer: These add a polished finish to the surface of the desk.
Foam and Batting Fabric: Used for creating cushioned surfaces. Such as a padded front desk.
Satin Fabric: Adds a decorative touch to specific areas of the desk.
Paint or Stain: Choose based on your desired finish. The paint brightens up the desk, while the stain shows off the wood grain.
Safety should always be a priority during any DIY project. Essential safety equipment includes:
Safety Glasses: Protect your eyes from dust, wood chips, and other debris.
Dust Mask or Respirator: Essential when sanding or working with chemicals.
Gloves: Use to protect your hands from splinters and abrasive materials.
Ear Protection: Important if you’re using loud power tools for extended periods.
Work Apron: Keeps your clothing clean. Provides handy pockets for tools.
Proper Lighting: Ensure your workspace is well-lit to avoid accidents.
When designing a DIY reception desk, you must consider the desk's size and shape. You must include functional features. You must make sure it meets ergonomic and accessibility rules.
Are you ready to transform your reception area into a stunning space that will impress all who walk through your doors? Look no further than creating your very own reception desk with DIY reception desk plans.
With reception desk design plans available for free online, there's no reason to settle for a boring, generic desk. Take control of your workspace and learn how to make a reception desk that reflects your unique style and brand.
Whether you're looking for a sleek, modern design or a more rustic, industrial look, there are DIY reception counter options to suit every taste.
Don't wait any longer – start building your dream desk today with build a reception desk plans and make your own reception desk a reality!
Select the appropriate size and shape for your reception desk. It depends on the available space. Also, the specific needs of your reception area.
A larger desk might be necessary. If we have many employees working. Or expect high customer traffic.
Shapes can range from straight to L-shaped or U-shaped configurations.
U-shaped desks provide ample space for storage and working. While L-shaped desks are compact and fit in corners. Straight desks are simple and versatile.
It’s essential to measure the area before making any cuts or adjustments.
Adding functional features. They can enhance the utility of the reception desk.
Storage options like drawers, shelves, and compartments. They are essential for organizing supplies and documents.
Consider including a keyboard tray for easy computer use.
Include cable management features. Like grommets and channels to hide wires.
We can also add specific areas for placing printers, and phones. Other office equipment to keep the workspace clutter-free.
Lighting elements, like small desk lamps or built-in LED strips. They can also be helpful for visibility and ambiance.
Ergonomics and accessibility are critical. They are for creating a comfortable and inclusive reception area.
Desk height should allow employees to maintain a proper posture. Reducing the risk of strain or injury.
Adjustable chairs or stools are a good investment for employee comfort.
For accessibility, the desk should accommodate wheelchairs. Following guidelines provided by the Americans with Disabilities Act (ADA).
We should ensure there is a clear path around the desk. Any reception counter is low enough for easy reach by all visitors.
Providing accessible writing surfaces for guests. This can also improve convenience and inclusivity.

One needs to focus on the construction process. Choose appropriate materials. Ensure stability and durability. This section will guide you through these key points.
Measure and Cut Wooden Boards: Begin by measuring. Cutting your wooden boards to the desired dimensions. Accurate measurements are crucial. Ensure all parts fit together.
Assemble the Base: Lay out the base pieces on a flat surface. Fasten them using wood screws and wood glue. Ensure the base is square by checking diagonals.
Add Vertical Supports: Attach vertical supports to the base. These will determine the height of your desk. Secure them to maintain structural integrity.
Install Cross Beams: Cross beams provide extra support. Attach them between the vertical supports. Ensure they are level. This will support the desktop and other components.
Attach the Desktop Panel: Place the desktop panel on top of the frame. Secure it with screws from underneath. Avoid visible fasteners. Double-check alignment for a flat surface.
Finishing Touches: Sand down all rough edges. Apply a finish to the wood to protect it and enhance its appearance.
Choosing the right materials for the frame will impact the desk’s durability and appearance.
Wood: Plywood, MDF, and solid wood are popular choices. Plywood and MDF are cost-effective and easy to work with. While solid wood offers superior strength and aesthetics.
Metal: Metal frames can be sturdy and durable. Using metal pipes or pre-fabricated frames can give an industrial look and added robustness.
Composite Materials: These combine the best of many materials. Offering durability and versatility. These are also lightweight. They can be easier to handle during construction.
Use Quality Fasteners: Invest in high-quality screws, nails, and wood glue. These ensure that the frame holds together over time.
Reinforce Joints: Adding corner brackets or metal plates. They can strengthen critical joints. Reinforcement provides extra security against potential weaknesses.
Check for Level Surfaces: During assembly check all parts. They are level and square. This prevents issues with the frame being uneven or unstable.
Consider Heavy-duty Materials: If the desk will hold heavy items, use thicker wooden boards and extra supports. This can prevent sagging and breaking.
Choosing the right surface for your DIY receptionist desk can impact its durability. Also, aesthetics, and maintenance needs. The type of surface material, finishing techniques, and upkeep all play essential roles. Creating a professional and functional workspace.
Wood: Wood is a classic choice for its natural beauty and strength. Hardwoods like oak, maple, and cherry are popular for their durability. They can be stained or painted to match any decor.
Laminate: Laminate surfaces are cost-effective. They come in a variety of colors and patterns. They are resistant to scratches and stains. Making them a practical option for high-traffic areas.
Other Materials: There are other options like metal, glass, and even stone. Metal can add an industrial look, while glass provides a sleek, modern feel. Stone, such as granite or marble. Offers a luxurious touch but can be heavy and expensive.
To achieve a professional finish, we can use several techniques:
Staining: Staining enhances the wood’s natural grain while adding color. It’s crucial to apply an even coat and wipe off excess stains to prevent blotches.
Painting: For a smooth, clean look, use high-quality paint and primer. Sand the surface for the best adhesion.
Sealing: Both stained and painted surfaces enjoy a coat of sealant like polyurethane. This adds a protective layer against scratches and spills.
Maintaining our desk surfaces keeps them looking their best:
Wood: Regular dusting. Occasional polishing helps maintain its shine. Avoid placing hot items on the wood to prevent marks.
Laminate: Clean laminate surfaces with a damp cloth and mild detergent. Avoid abrasive cleaners that can scratch the surface.
Other Materials: Metal surfaces can be wiped down with a soft cloth and mild cleaner. Glass requires regular cleaning to prevent fingerprints. While stone surfaces need specific cleaners. Avoid discoloration.
Adding effective storage solutions to a DIY receptionist desk is important. Drawers, cabinets, and shelving units make it easy to organize. While custom storage solutions ensure you use all available space.
We need to think about dimensions and accessibility. Drawers can store office supplies, files, and personal items.
Measure the space under the desk to make sure the drawers and cabinets fit well. Soft-close mechanisms can be added to improve durability and reduce noise. Dividers in drawers help keep items organized.
Increases storage without taking up floor space. Floating shelves add a modern look and can hold used items.
Adjustable shelves are great. Accommodating different-sized items. We can use wall brackets for stability. Ensure shelves can support weight. Open shelving keeps everything visible and easy to grab.
Maximizing space with custom storage solutions. It lets us tailor the desk to our specific needs. Built-in cubbies can hold mail or small office supplies. We could even add a hidden compartment for valuables.
By using every inch of space, we maintain a clean work surface. Modular designs allow for rearranging as needs change. Custom storage solutions can be made from affordable materials. Like plywood or recycled wood pallets. Ensuring both functionality and cost-effectiveness.
Accessorizing with baskets or bins inside the storage units. Keeps items neat and easy to find.

It’s important to manage electrical outlets and cables well. Planning for all necessary electrical needs. Make sure cables are hidden. We create a tidy and efficient workspace. Seamlessly incorporating technology. This further enhances the desk’s functionality.
We must start by counting all the devices that need power. This includes computers and phones. Any other electronic gadgets.
Mapping out where each device will be placed. It helps in deciding the optimal locations for outlets.
For safety, we should ensure that outlets are easy to reach but not in the way. Surge protectors are also a good investment to protect our electronics. Consider installing outlets that come with USB ports. Reduce clutter from many chargers.
Messy cables can make our desks look untidy. Using cable organizers like trays or sleeves helps keep everything neat.
These can be attached under the desk or along its sides to guide the wires away from sight.
Velcro strips or zip ties. These help bundle groups of cables together. Reducing tangles. Holes can be drilled at strategic points in the desk to feed cables through. Keeping them out of view.
We need to think about integrating technology into our desk design. This means planning spots for monitors, and printers. Other gadgets that will not clutter the workspace.
Wireless devices can reduce the number of cables needed.
Having built-in charging stations or docks for devices. They can also keep the area organized. We should ensure all technology is easy to access. Use without disrupting the clean look of the desk.
Elevate the look of a DIY receptionist desk. Several aesthetic enhancements can be applied. From painting and staining. Adding decorative trims and personalized touches. Each approach offers unique ways to enrich the desk’s appearance.
Are you looking to give your workspace a stylish and professional upgrade? Look no further than build your own reception desk!
With easy DIY reception desk tutorials available online, you can create a stunning piece that reflects your unique aesthetic.
Say goodbye to boring and outdated furniture, and hello to a sleek and modern workspace that will leave a lasting impression on clients and colleagues alike.
Whether you're searching for tips on how to build reception desk or want to try your hand at a homemade reception desk, the possibilities are endless.
Take the first step towards transforming your office by investing in a reception desk that not only improves functionality but also enhances the overall look of your space.
Get ready to make a statement and elevate your workspace with a custom-made reception desk!
Painting and staining can transform the look of your receptionist desk. Choosing the right color scheme is key. We recommend selecting shades that align with your brand’s identity.
For a sleek, modern finish, consider high-gloss paints. Chalk paint can bring a vintage or shabby-chic look. If you prefer a natural feel, a wood stain might be the perfect choice.
Here’s a tip: Sand the wood surface before applying paint or stain. Ensure a smooth application. A longer-lasting finish.
Decorative trims and moldings can add sophistication. Also, depth to a receptionist's desk. You can choose from a variety of materials such as wood, plastic, or metal.
Crown molding can give the desk a more formal look. While beadboard panels can add a touch of rustic charm. When selecting trims, consider the design style of your office.
Pro tip: Use adhesive or small nails to attach the trims. Then paint or stain them to match the rest of the desk.
Personalizing the receptionist desk can make it yours.
Consider incorporating elements. Like custom nameplates, branded signage, or unique drawer pulls. Small accents like decorative bowls or coasters can add personality.
For a creative touch, use a grid collage to display photos or inspirational quotes.
Remember: Personalization is about reflecting your brand. Also, what makes your workspace special?
Assembling and installing your reception desk requires careful attention to detail. Ensure stability and functionality. Follow these key steps to assemble the desk components. Secure them. Make final adjustments and inspections.
Are you ready to take on the challenge of building and installing your own reception desk? With reception desk DIY projects becoming increasingly popular, there are endless possibilities for creating a unique and stylish front desk for your space.
From scouring the internet for how to build a reception desk tutorials to browsing through DIY reception desk ideas, the options are endless.
And the best part? There are plenty of reception desk plans free available online, making it easier than ever to get started on your project.
So why wait? Take the plunge and start working on your very own DIY front desk today. With the satisfaction of knowing you built it yourself, you can't go wrong.
So roll up your sleeves, gather your tools, and get ready to make reception desk dreams a reality.
It's time to build your own reception desk and create a space that truly reflects your style and personality.
We start by gathering all the pre-cut wood pieces. Lay them out and identify which pieces are for the front, sides, and top of the desk.
Use nails or screws to attach the side panels to the front panel. Make sure the connections are firm.
Next, attach the back panel and then the top surface of the desk. It is important to use a level to ensure the top is even.
Secure the connections. Adding extra screws or brackets if needed. If your design includes shelves or drawers, install them last. Make sure each component is sturdy and fits well.
Finally, apply any finishes or paint as desired. This will not only protect the wood but also give your desk a polished look. Wait for the paint or finish to dry completely before proceeding to the next steps.
Once the desk is assembled, position it in the desired location.
We recommend securing the desk to the floor or wall for added stability. Especially if it will be used.
For wooden floors, use L-brackets to anchor the desk legs to the floor.
If attaching to a wall, use wall anchors and screws.
Mark out the positions for the brackets on the wall and desk. Drill holes and insert wall anchors.
Align the brackets and screw them in place. Make sure the brackets are tight and the desk does not wobble.
Guide all cables and cords through the designated holes. This will keep the workspace tidy and prevent tripping hazards.
With the desk secured, it’s time for final adjustments.
Check that all screws and brackets are tight. Any loose connections should be reinforced.
Use a level to ensure all surfaces are even and adjust if necessary.
Inspect the desk for any rough edges or unfinished areas. Sand down any sharp edges or splinters.
If the desk has drawers or movable parts, test them to ensure they slide and are aligned.
Clean the desk surface to remove any dust or debris from the assembly process.
With everything in place, you are now ready to set up your workspace. Start using your new reception desk. Ensure that the desk looks professional. Ready to impress anyone who walks through the door.

When comparing DIY costs to pre-made desks, it’s clear that building your own can be more affordable.
Pre-made desks can range from $500 to over $2000. Depending on the design and materials.
In contrast, a DIY desk might only cost between $200 and $300, including tools.
Pre-made desk benefits:
DIY desk benefits:
Pre-made desks often come with high-quality finishes. Professional assembly but at a higher price.
A DIY desk allows for more creativity and savings but requires time and effort.
Consider using reclaimed wood or furniture. An old table can be repurposed into a reception desk. It lowers material costs.
Buying tools second-hand. Borrowing them can also cut down on expenses.
Shop sales and use coupons for materials. Look for discounts at hardware stores. Especially during big sales events like Black Friday or end-of-season sales.
Using recycled or leftover materials for decoration. They can add unique touches without extra cost.
Plan your project. Buy only what you need to avoid waste.
You can build a stylish, functional, and cost-effective reception desk for your shop.
It's crucial to avoid errors that can lead to wasted time, resources, and frustration. Let's explore how to steer clear of such issues.
One of the key mistakes to avoid is inaccurate measurements. Precise measurements are vital. Ensure the desk fits the designated space.
Invest time in double-checking your measurements before cutting materials.
Use a tape measure to get the exact dimensions of both the room and the materials. Mark all measurements and use a square to check for right angles.
Even a minor error can cause significant issues during assembly.
Additionally, consider potential obstacles like door swings and furniture placements. Ensure smooth integration.
Refer to the instructions to inspect the area and take exact measurements.
Efficient management of time and resources can prevent delays. Plan before starting your project. Listing all necessary materials and tools.
Divide enough time for each step. Accounting for potential setbacks.
Purchasing quality materials upfront. It can save you from frequent replacements.
It might be tempting to cut costs. Using substandard materials can lead to long-term issues.
Keep track of all expenses to stay within budget.
Set up a workspace with good lighting and ample room to work. This helps to stay organized. Avoid misplacing tools or materials.
Following detailed plans helps manage your resources.
The structural integrity of your desk is paramount. The desk must be sturdy enough to withstand daily use without wobbling or breaking.
Start by selecting the right wood type and thickness.
Laminate boards to increase strength.
Ensure that all joints are fastened with screws, not nails or glue. Reinforce corners with braces for added stability.
Check that the desk is level and balanced before finalizing any joins. Uneven surfaces can lead to structural weakness and potential tip-overs.
Inspecting the build progress helps catch and correct issues early. Ensuring a durable final product.
Archic Furniture stands out by offering specialized furniture solutions. We combine style and functionality, particularly for reception areas. Our products are designed to enhance both aesthetics and utility.
MDD is one of our standout offerings. These desks are not only appealing but also practical.
MDD desks are designed with a modern touch. Using high-quality materials like laminate and metal. Ensuring durability and easy maintenance.
They come with built-in cable management systems. Helping keep workspaces tidy and organized.
The modularity of MDD reception desks allows for customization. Based on workspace requirements.
Including adjustable heights and many storage options. These desks cater to both the receptionist and customer needs.
They also offer optional add-ons like lighting kits. Enhance the desk's functionality. Elevate the office's ambiance.
Reception Counter Solutions line focuses on combining elegance with practicality. The Quad Tech Class 1 Reception Desk in this collection is handmade in the USA. Featuring high-quality laminate surfaces. They are easy to clean and maintain.
This desk is built with plastic sliders to prevent floor damage. Making it a durable choice. The design is contemporary. Suitable for high-class reception areas seeking to make a strong impression.
With hidden storage compartments. These desks help maintain a clutter-free workspace. Promoting a professional environment.
Their sleek design and robust build make them a preferred choice for many modern offices.
A well-designed reception desk is a crucial component of any shop's layout. It serves many purposes. From organizing customer interactions. Creating a pleasant first impression.
Our design choices should emphasize both functionality and aesthetics. Using quality materials and maintaining a clean. Inviting appearance can impact customer satisfaction.
We should invest in ergonomic designs. Ensure both customers and staff are comfortable.
Thoughtful design enhances the experience. Makes daily operations more efficient.
Focusing on maintenance and branding. We can keep the reception desk looking fresh. Aligned with our shop's identity.
Simple cleaning routines and periodic updates will keep it inviting.
Let's remember the importance of investing in a high-quality reception desk. It meets the needs of our retail space. A well-thought-out reception area contributes to customer engagement and business success.
Let's consider all these aspects to create an efficient and welcoming environment.
Yes, you can. Many DIY receptionist desk plans are designed for beginners. Simple tools and materials like wood glue, and screws. Basic woodworking equipment is often all you need.
The ideal size for a receptionist's desk varies.
Generally, a length of about 72 inches. A height of 43-3/4 inches for the main counter, and a width of 25-3/4 inches work well. This sizing accommodates most office needs. Ensures comfort and efficiency.
An effective setup should include storage spaces. A keyboard tray, drawers, and cable management solutions. These features help keep the workspace organized. Functional for daily tasks.
Choose durable and high-quality materials like hardwood, plywood, or MDF.
Laminate the surfaces for added protection and a polished look. Ensure all parts are fastened. Consider using weather-resistant finishes.
A DIY receptionist desk project takes about a weekend to complete. This depends on your experience level and the complexity of the design.
Some simpler designs can be completed in a day. While more intricate desks may take longer.
If you are still on the fence and not sure what to purchase, reach out to us, we recommend connecting with one of our furniture experts who would be delighted to help you find the perfect DIY receptionist desk for you. You can reach out to us at:
Call/Text: (916) 262-7257. or;
Email: support@archicfurniture.com
We would be more than happy to help you find the perfect receptionist desk for your needs!


placeholder